Showing posts with label Polymer clay. Show all posts

Sunday, October 26, 2014

[Tools] Mod Podge Mod Melts and Molds


I am a fan of Plaid Crafts, particularly their Mod Podge line of products, decoupage art and all.  They have another product line called Mod Melts and Mod Molds that have been around for a couple of years but for some reason, I only took notice a couple of months ago.


I bought a bag of Mod Melts in milk glass white and the Ornamental mold from my craft buddy, Michaels.  The sticks resemble that of a glue gun stick but it is thinner and uses a hi-temp glue gun. If you're familiar to using a glue gun, it's basically the same so be careful not to burn yourself and keep your working area clean and free of dust and lint.

There are Youtube videos by Cathy and Steve demostrating how easy it is to use.  Yes, it looks nice but it takes practice to squeeze the right amount of glue in the mold and making sure that there are no air pockets.  The piece cools pretty quick and it pops out quite easily.  Then you can add color or paint and incorporate them in your projects.

I tried to use a cameo mold and compared using the Mod Melts vs using Premo Sculpey Accent Pearl Polymer Clay.  I wanted to compare the details and ease of use of the different mediums.


The photo on the left was done using Mod Melts in milk glass white and the cameo on the right was with Premo Sculpey Accent pearl polymer clay that was baked according to manufacturers specifications.  Which one do you like?

I had difficulty in squeezing the mod melt into the mold vs the polymer clay where I conditioned and rolled a ball of clay.  I also noticed that the details using the mod melt are not as distinct as when I used polymer clay.  Perhaps I used a "difficult" and too detailed mold for my mini experiment but I wanted to push its limit.  The mod melts harden faster and is ready in no time whereas polymer clay has to bake for about 20 mins.  The Mod Molds are very nice and detailed as well.  The quality is excellent!

Have you ever used Mod Melts or Mod Molds before?  How did it go?   Please share your experiences with me.

See  you soon!
michelle

Wednesday, October 1, 2014

[Project] Hello, October!

Hello, October!  What?  Where did the time go?  It was this day last year when my parents and sister came to the US, yes, on the day of the government shutdown.  The memories are so fresh in my mind.

Well, I wanted to start the month making jewelry hence I made earrings!  I saw this article by one of my Bead soup blog party partners, Melissa Meman, in the April -May 2011 issue of Step by Step Wire Jewelry.  How cool is that?  I used peridot teardrop glass beads and copper wire.  It is not quite finished yet but it's a good start.

Melissa Meman's Article

I wanted to share with you this pair of Faux Stone Earrings that I made during my Integrated Earring Design Class with Ms. Kathleen Dustin.  These were made several months ago from polymer clay beads but I didn't know how to design and make use of them.  I added sterling silver wire that I oxidized and wow, I love how it turned out.  I'm planning to make more of these.
Faux Turquoise Stone made from Polymer Clay
Sterling silver earwire
I hope you enjoyed your first day of October.  Take care and see you soon!
michelle  ♥

Wednesday, June 11, 2014

[Challenge] Phil. Polymer Clay Guild "Merry Month of May 2014: Polymer Clay Flowers"

The challenge of the Philippine Polymer Clay Guild for the month of May was ti create something new using polymer clay flowers.  I've been making a lot of floral themed pieces, mostly daisies or simple flowers with 5 petals and I didn't know what to do for this challenge.  Then one day, while I was cleaning my craft room, I found a tutorial about "Orchid Pin or Pendant" that I bought from Ms. Penni Jo Couch during the 2013 Lone Star retreat.  The tutorial was simple, well written and well illustrated. 
Polymer Clay "Rhoda Orchid" Napkin Ring
This is my "Rhoda Orchid."  I named it after my mom who loves and grows orchids back in the Philippines.  There are several varieties of orchids but the color combination that I used in making this one are probably non-existent.  It's more of like a fantasy orchid, if you could call it that.  
Polymer Clay "Rhoda Orchid" Napkin Ring
This project made use of Premo sculpey clay.  I also used Ranger alcohol inks in Sunshine Yellow and Butterscotch to add color to and specks on the white petal.  I like how it turned out - very rustic. I'm planning to make "real life" orchids in white like Cattleyas and green Cymbidium.  They will make pretty sets of napkin rings just like this one for weddings or intimate dainty parties.  Stay tuned for that.

Oh, did I mention that it is National Clay Week?  Yes it is!  

See you soon!
michelle

Tuesday, April 15, 2014

[Challenge] A Whimsical Eggciting Birthday!


Today is an "Eggciting Day" for me and the blog because it's my birthday!   Wooohooo.  Thank you for all 
your love and kind greetings.  Early this morning, we were able to catch the first of the Four Blood Moons - NASA says that seeing four complete lunar eclipses in a row is very rare and we will have one every 6 months until October 2015.  We have never seen one so we stayed up late for it and it was amazing! We just stood in awe at how great and might God is - He who created the heavens and the earth.

This project is part of the Philippine Polymer Clay Guild's "Something Whimsical Challenge" and Martha Stewarts "marthasgoodeggs" intsagram post.  The first challenge for me was to figure how to remove the contents of the egg while keeping the shell intact.  So, I did some research and ewwww... it was totally gross!  Let me be graphic here:  make 2 holes on both ends of the egg, burst the egg and mix it up with a needle tool and finally blowing the contents out.  Now don't tell me I didn't warn you.  Anyway, after cleaning and drying the eggshell for 24 hours, I got to work on it.

Friends, meet "Mini-Me."  Oh, isn't she cute?  She's having a wonderful time strolling with her yellow birthday balloon, enjoying the sight of bluebonnets and other wildflowers.

This is made from 100% Premo sculpey polymer clay using the applique technique which is a very tedious and meticulous process that takes a lot of patience, gentle hands and the ability to hold your breath for a long time.  The latter helps to concentrate in order to be precise in putting the components in place.  Whew!

May your days be blessed!
michelle

Saturday, March 15, 2014

[Bottles of Hope] Spreading Good Cheer through Art

"Hello.  My name is Princess Zita.  Would you like to have tea with me?"
"Have Tea with Me"
Polymer Clay
Isn't she adorable?  She is going to a special patient as part of Bottles of Hope.  The Bottles of Hope project started in  1999 by Diane Gregoire, a polymer clay artist and cancer survivor who used her talents to bring cheer to cancer patients by covering glass medicine bottles with art and giving it to them.  The members of the Houston Polymer Clay Guild has been actively participating in this endeavor.  I always look forward to coming to the guild once a month to chat, to learn and to see what projects the others have done.
Houston Polymer Clay Guild
Bottles of Hope
March 2014
Look at these unique pieces of art.   There are a variety of techniques that were used to make each bottle - oh, the wonderful world of making canes! 
Houston Polymer Clay Guild
Bottles of Hope
February 2014
Last February, I made a bottle using colors that were southern/rodeo inspired.  I also added rope and tassels.  As always, all the bottles were beautiful but one of the hits that brought us to the moon (no pun intended) was this NASA astronaut... oh, the details on the logo and flag were just amazing!

It is my prayer that each bottle of hope would bring love, joy and a sweet smile to each recipient.

Blessings!
♥ michelle

Wednesday, February 5, 2014

[Jewelry] Polymer Clay Faux Turquoise Necklace

Polymer Clay Faux Turquoise
I.  Am.  Back!  How are you?

One of our dear friends celebrated her 50th birthday and we gave her a surprise celebration!  Whew!  The 3 weeks of preparation, secret meetings and close encounters was fun and we're glad it turned out to be a wonderful celebration.  The theme of the party was "High Heels" since she loved wearing them and we used the colors:  black, gold and white.  

This was the necklace that I made for her.  The pendant is faux turquoise made from polymer clay.  To complete the necklace, I added mother of pearl square spacers, red and black crystals and ceramic beads all wired and attached to a chain.  It drapes the neck nicely and is very elegant.

So, how are you?  Have you been doing a lot of projects lately?

Have a blessed day!
 michelle  ♥

Tuesday, January 7, 2014

[Jewelry] "Circles" - A Polymer Clay Pendant / Brooch

"Circles"
It's been so cold recently with temperatures falling -16 in Chicago with wind chill warnings in effect.  We are feeling the cold in Houston too, with 29C Monday morning and even colder today.  So we've been dressing extra extra warmly, scarf and all.

I bought this lovely scarf at a shop as a gift for my sister-in-law.  The design inspired me to make a pendant / brooch from polymer clay that incorporated circles.  I used Premo polymer clay, both regular and translucent clay.  It was a fun and beautiful project to make.  Pardon the messy backing - I redid it but forgot to take another photo.  Ngek.
"Circles"
Polymer Clay Pendant / Brooch
It can be worn as a pendant or as a brooch.  I think it's simple but elegant.
I hope she likes it.  Happy Birthday!

♥  michelle  ♥

Sunday, December 22, 2013

[Flashback] January 2013: Celebration and Travel!

Nine days from now, we will be welcoming Year 2014.  Oh boy... where did the time go?  
January is our wedding anniversary month and we celebrated our 4th this year.  Oh, what a joy to be married to my husband.  God has blessed our marriage with His grace and love.  We may not have a lot financially but we never grew hungry and even enjoyed the pleasure of travel and good food.  I totally love the professional stainless steel bowls that he gave me.


We've never been to San Antonio so we decided to visit and check out the featured restaurants for the weekend.  
Carmens de la Calle -  We were able to meet the owner, Carmen and watch Flamenco.  Very nice!  
Their sangria, paella and empanadas were delicious!

Mi Tierra - The place is open 24 hours and is always packed during peak hours.  We were lucky that there was no queue when we arrived.  When you enter the restaurant, be prepared to be transformed to a place filled with Christmas lights, shiny paper and trimmings.  As their website describes:  "MiTierra is a little loco and a lot of fun!"  Wooooo!  Their chicken tortilla soup is delicious and very traditional (not like those in TexMex restos).  Oh, when you do go there and try them out, check out their mural.

Lulu's Bakery and Cafe - Lulu's takes the quote:  "Everything is BIG in Texas" to heart.  Golly!  Their "Texas sized portions of great tasting home cooking at reasonable prices" philosophy is just that.  HUGE!  They were featured by Adam Richman of Man vs. Food for their Country Fried Steak and 3 1/2 lb cinnamon roll.
They speak highly of their country fried steak which my husband really loved - he got the "Deputy Special" which was more than enough for both of us.  Our visit wouldn't be complete without trying the cinnamon roll - it was really huge but surprisingly soft, moist and not too sweet.  We had to take it home where it lasted a couple of days before we could reach the "nugget" or the yummy, center of the roll.     
San Antonio Texas, Carmen's, MiTierra, Lulu's Cafe
 The Riverwalk was beautiful!  The weather was sunny and cool, perfect to take the river cruise!
That Sunday, we went to church at Oak HIlls Church after which we had a hectic social schedule:  we met with my Uncle and his family for dinner at the original location of Rudy's in Leon Springs.  Well, I don't know if our minds were conditioned, but it tasted better than the other branches (my folks said it's this particular locations' roasters makes the difference).  After dinner, we met with my sister-in-laws beautiful niece.  I made her a polymer clay heart monogram and card.
Rudy'sthe Alamo
Fun times and wonderful memories!  It was a nice way to start the New Year!
Cheers!
 michelle  ♥
Market Square, San Antonio

918 N. Main, San Antonio, Texas

24152 W. IH 10, San Antonio, TX 78257
Phone: 210-698-2141 

Tuesday, December 10, 2013

[Christmas] HPCG 2013 Party

The Christmas season is filled with parties left and right and I am loving it!  The HPCG had our Christmas party this past Sunday hosted by the gracious Ms. SP.  I brought home made Chicken Enchiladas.  We had fun exchanging and stealing gifts - there were a couple "hot items" that were a hit!

I gave these:  LP's Magic Gloss, a set of bezels and a mother-of-pearl pendant/brooch.


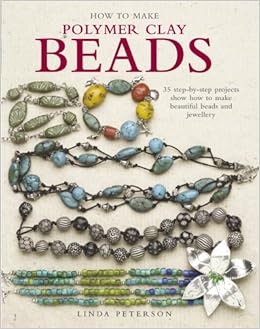
I initially picked up a set of Lumierre inks but it was "stolen" from me.  LOL.  I ended up picking a book:  "How to Make Polymer Clay Beads" by Linda Peterson.  It's just what I need.

Until next year!  Now I'm off to more parties!
♥  michelle  ♥

Sunday, December 1, 2013

[Christmas] It's the Most Wonderful Time of the Year!


It's the 1st day of my favorite season of all!

Polymer Clay Christmas Manger
Ornament

"For to us a child is born, to us a son is given, 
and the government will be on his shoulders.
And he will be called Wonderful Counselor, 
Mighty God,
    Everlasting Father, 
Prince of Peace."

Isaiah 9:6

Sunday, October 27, 2013

[Challenge] Polymer Inchies

Hello friends!  A couple of months ago, I shared with you the INCHIES that I made for a swap hosted by Ms. Tonja Lenderman.  We were asked to make 12 inchies per group and since I joined 2 groups, I made 24 inchies.


This first set of polymer clay inchies shows my love for floral themes.  The base is Premo sculpey in Ecru that was measured, cut, baked and cooled and layered with a mixture of green Premo sculpey that I textured.  The floral cane was made from Premo sculpey in white, yellow, and translucent that I sliced thinly to form the petals.  I added an orange shaded clay in the center.  Finally, each piece was sanded and buffed.
Premo Scupley Component Flower Cane
I had fun making these next set of inchies.  I used extruded canes using Premo sculpey purple, white, turquoise and black and layered them over previously baked base.  The final piece was baked, sanded and buffed to a glossy sheen.    
Extruded canes
The inchies that I got from the swap were awesome!  I love the variety of designs.  Thank you, ladies!

There is another Inchie swap coming soon hosted by Ms. Julie Thorpe and I joined 2 groups again.  I have finished 1 set and the other  will be done by the end of this week.

See you next time!

♥  michelle  ♥

Friday, October 4, 2013

[Video Tutorial] Polymer Clay Mold Release Agents: Water or Cornstarch?

Welcome back!
I bought this Poinsettia and Holly Flexible Mold from Penni Jo Couch of Best Flexible Molds.  The most common mold release agents are water and cornstarch powder though others use Armor all.  
I tried not using them but more often than not, the details of the mold were lost when I release them.


In this tutorial, I used cornstarch powder and water as mold release agents.  Both worked pretty well - just remember not to apply too much.

Do you use mold release agents?
Please feel free to write your comments below or email me at cabbycraft@gmail.com

Have a blessed day!
♥  michelle  ♥

Monday, September 30, 2013

[Ornaments] Christmas in September: Premo Sculpey


Hello friends!
It's the last day of September and Polyform Products presents "September Make It Your Own Christmas Ornaments."

These ornaments were inspired by Ms. Barb Fajardo's Buttons that I learned during the recent Lone Star Retreat.  I used Premo Sculpey as the base and added texture and color to it.
I placed a round bail, added wire in the shape of a 1/2 Christmas tree and if you put them side by side, it forms the shape of a tree... cool?


It is Christmas in our home this early as my loved ones are visiting us for a few weeks.  

As of this writing, we are waiting whether there will be a government shutdown.  I hope it gets postponed even just for a few weeks to allow my folks to visit the museums and NASA.  It would be best if they keep them open for everyone to enjoy the past and the future.  I'm just saying....

Have a wonderful week ya'll!
♥  michelle  

Friday, September 27, 2013

[Challenge] I'm a Winner! Polymer clay faux stone

Do you remember the "Serenity Necklace" that I shared HERE?  Well, it won 3rd place among 16 entries during our guilds' recently concluded retreat challenge "Friends and Faux."  Wooohoo!  I have been doing the happy dance since the weekend.

Premo Sculpey Polymer Clay Faux Larsonite Stone Embroidered Necklace

The left photo is the original piece but I decided to add picot edging which turned out pretty nice.  The cabochons were made using Premo Sculpey polymer clay and alcohol inks.
Someone told me that it looked like Larsonite or Gary Green Jasper.  According to Hetties' website: 
[via]

"Larsonite is also known as Gary Green Jasper, or McDermitt Green Jasper. "Wood, algae, other swamp vegetation and mud were covered by volcanic ash between and 11 and 14 million years ago. Water carrying minerals seeped in creating the green colour while it petrified. The colours are from a combination of iron (44,600 PPM), Alluminum (11,000 PPM), Potassium (5,030PPM), Sodium (1,550 PPM), and Calcium (1,020 PPM)."

I was humbled by the recognition that I received from my peers.  This inspired me to practice and be more creative.  It takes a lot of patience and love for the craft or whatever it is that we are doing to come up with something wonderful.

Have a wonderful day!
♥  michelle  

Tuesday, September 17, 2013

[Challenge with Cabochon] Serenity Statement Necklace: Faux Stone Polymer Clay Pendant

The Studio Sublime


Hello friends and welcome to the reveal date of The Studio Sublime's 
hosted by Ms. Sally Russick.


"Serenity Statement Necklace"
by Michelle Escaño-Caballero
se·ren·i·ty

"the state of being calm, peaceful, untroubled"
"an oasis of serenity amidst the bustling city"


Serenity Statement Necklace
Faux Stone Polymer Clay
      There is a feeling of peace and calm whenever I do something that is far beyond what my day at the office is.  I like spending time at home and being creative.  This challenge was a long process that took about 3 weeks of my free time to finish.  
I love making cabochons from polymer clay so I made 3 teardrops using the Rocky Path technique that I have shared in this blog a couple of times.  Doesn't it look like stones?

Serenity Statement Necklace
Polymer clay cabochon:   Rocky Path Technique
Faux Stone
The embroidery took about 4 nights to finish and that includes sewing and unsewing the beads. LOL.  I am happy with how it turned out but I think I will add a picot beads on the border... perhaps I will write a post blog article on that.

In the meantime, let's head over to The Studio Sublime and see more beautiful pieces.  


Our Host:  Sally Russick
Alicia Marinache           
Lynn  Jobber           
Jenny Davies-Reazor           
Jen  Judd           
Jo-Ann  Woolverton           
Marde Lowe           
Dawn Doucette           
Mary K McGraw           
Gloria Allen           

Cheri  Reed           
Sonye Stille           
Elizabeth Owens Dwy           
Veralynne   Malone           
Tania Hagen           
Lynsey  Brooks           
Christina Miles           
Holly  Westfall           
Kathy  Lindemer           
Patti Vanderbloemen           

Therese Frank           
Adrienne Berry           
Tanty  Sri Hartanti           
Renetha Stanziano           
Marlene  Cupo           
Sandi Volpe           
Sharyl McMillian-Nelson           

Mischelle Fanucchi           
Tracy  Stillman           
Skylar Bre'z           
Ann Schroeder           
Jess Green           
Susan Kennedy           
Stacie  Florer           
Cathie  Carroll           
Susan F.   
Michelle Caballero  -  You are Here  ☺     
Sabine Dittrich           
Kristina Johansson           
Kimberly Sturrup-Roberts           
Melissa  Meman           
Cheryl McCloud         
Michelle  Timms           
Cindy  Pack           
Ailsa  Cordner           
Cynthia  Machata           
Julia  Harris           
Ingrid  Anderson           

Have a wonderful day!  
♥  michelle  

Monday, August 5, 2013

[WIP] My Clay Fantasy Polymer Clay Inchies

Welcome back!
Do you remember the Polymer clay Inchies that I made for the Phil. Polymer clay guild last year?  That time, we were asked to do 4, but I ended up doing 8 because the first batch got lost in the mail.  
Read more about it here.

This time, I made 2 sets of 12 equals 24!
Oh yeah... Crazy fun!

I finished making it tonight however, I can't reveal these cute little ones yet.  I made 2 different sets with the using 2 different canes and techniques.  

These will be revealed sometime in soon.  I just have to mail them this week so they could be received by August 16 for sure.  

See ya!
♥  michelle  ♥

Saturday, August 3, 2013

[P3 Guild] Mosaic Challenge 2013

The Philippine Polymer Clay Guild recent;y concluded their Mosaic Challenge.  You can read about it HERE.
My entry was #12 - I made a 4x6" frame with the phrase:  "Hope Springs Eternal" by A. Pope.
It was my first time to make a complicated mosaic.  I started by drawing the design on a graph paper and placing it under the 4x6" glass that came with the frame.  The mosaic tiles were assembled and baked on the glass.


I used the Rocky Path technique to make the bottom layer, to make it appear organic.


The orange and yellow flowers were made from polymer canes.  These were layered accordingly.
I like the finished product - it looks like a backdrop of a cascading water fountain.


Thank you for visiting the Guild's page and this blog.
Have a wonderful day!
♥  michelle  ♥.

Wednesday, July 31, 2013

[Philippine Polymer Clay Guild] Mosaic Challenge 2013

Welcome back!
Can you believe it? It's the last day of July - yay or nay?  

I am part of the Philippine Polymer Clay Guild and we recently had our Mosaic Challenge.  There were 28 entries with different themed projects.  You can visit our Facebook page to vote for / like your favorite.  Deadline for voting is on August 3 and prizes await the lucky voter.

Check out these photos:
Philippine Polymer Clay Guild Mosaic 2013
The intricate patterns of the projects below are really nice.
Philippine Polymer Clay Guild Mosaic 2013
Aren't they all pretty?
Philippine Polymer Clay Guild Mosaic 2013
The next photos are really cute!
Philippine Polymer Clay Guild Mosaic 2013
Here are some more:
Philippine Polymer Clay Guild Mosaic 2013
Thanks for dropping by the blog.  Please visit the Philippine Polymer Clay Guild FB page and cast your vote.  Show us some love and "LIKE" our FB page while you are there ♥.

I cannot divulge my project yet until August 4 but I hope you'll visit us and vote.

Have a wonderful day!
♥  michelle  ♥