Showing posts with label DIY. Show all posts

Monday, August 11, 2014

[Sewing] I'm Sew Addicted!

Hello August, you surprised me!  I wasn't quite ready to leave July behind and now, it's just 4 days til we hit the 15th.  Geeeeez.  Welcome back, friends!  Thank you for taking time to come back and hang around with me.  Let me tell you what's keeping me busy these days.

See this?  Oh yes, I got me Singer sewing machine a month ago and I'm sew addicted to sewing! Really.  When I was young-er, my Mom and my Aunt taught me how to sew using a needle and a thread to mend hems, buttons and what not.  Then they taught me how to use our manual Singer sewing machine.  We made dresses for my Barbie dolls, skirts, pillowcases and comforters.  When I was in high school, our teacher asked us to make a smocked sundress which was quite challenging at that time.  

Since I came to the States, I discovered that my dear mother-in-law also had a Singer sewing machine. I tried to fix and use it but I think that it has to be brought to the sewing clinic for a more thorough examination.  Two months ago, the thought of buying one haunted me.  No kidding.  

Enter Google... 

Just like any buyer these days, I did my internet research which turned out to be overwhelming.  There were different brands to choose from but I chose to get a Singer since its the brand that I trust and for sentimental reasons.  Upon checking their site, I discovered that there were so many machines to choose from:  basic, very basic, electronic and embroidery.  Whew!  So, I wrote down the features that I wanted:  durability, good motor, price, enough stitches, and 1-step buttonhole among others.  In the end, I bought the Singer Heavy Duty 4432.  You may have your brand or machine preference but so far, this works well for me.
[via]

The first project that I did was a throw pillow cover.  This 1 yard yellow and blue outdoor fabric was enough to make a couple.  I measured our throw pillows and cut  a 1-inch seam allowance all around. To avoid fraying, I added a narrow zigzag stitch on all the edges.  Stitch the wrong side of the three (3) corners, leaving one side open.  Insert the pillow and close the opening using whatever you have available.  I used small button fasteners.  You stitch a ribbon on both sides, add a button and buttonhole, etc.  Get creative.

Blue Floral and Yellow Pillowcase
 Here it is.  Not bad at all.  I was able to make three covers.
Blue Floral and Yellow Pillowcase
There will be a new feature in the blog starting today.  You guessed it right!  We will be adding topics on  SEWING!  Wooohooo!  We will talk about tools, patterns, projects, bags and everything about sewing.  Stay tuned for that.

Sew you soon!
michelle


Wednesday, July 30, 2014

[Crafting] Recycled Streamers Deluxe

The cost of craft and designer paper has gone up these days and I feel bad to just throw scraps away. I love to recycle paper, extend its life and multiply its purpose.  We had a lot of decorating to do this month wherein we used blue streamers that I bought from the dollar store.

This was the backdrop for the dessert table during our Sunday luncheon for our Pastor.  I made paper rosettes using bright, colored pattern paper and my Martha Stewart scoring board.

Streamers and DIY Paper Rosettes

We used the same bright decors to decorate one of the rooms for the Vacation Bible School.  Doesn't it look fun with the twisted streamers?  Well, it was my husbands Bible Adventure room so I guess there's a little bias in saying that.

VBS Classroom Decor
Streamers and DIY Paper Rosettes
 We didn't throw the rosettes and streamers after VBS.  As always, I thought that it could be used for another day.  Well, that day did come.  Our church volleyball team was one of teams who competed for the championship.  They played last year too and they placed 2nd - remember THIS tutorial using blue tissue paper last year?

This time, I used the streamers to make these pompoms.  I folded, cut 1/4 strips and wrapped it with tape.  Simple.  Dirt cheap.  Clean fun!  Did they win the championship?  Yes, they did. It was neck and neck, very exciting game!

Volleyball and DIY Pompoms

Congratulations, team 1st Phil!


Do you like to recycle decor and craft supplies like I do?  Cool!

Have a wonderful day,
michelle

Tuesday, July 1, 2014

[Baby Shower] DIY Sailboat Diaper Cake

Sailboat DIY Diaper Cake

Happy 1st of July, folks!

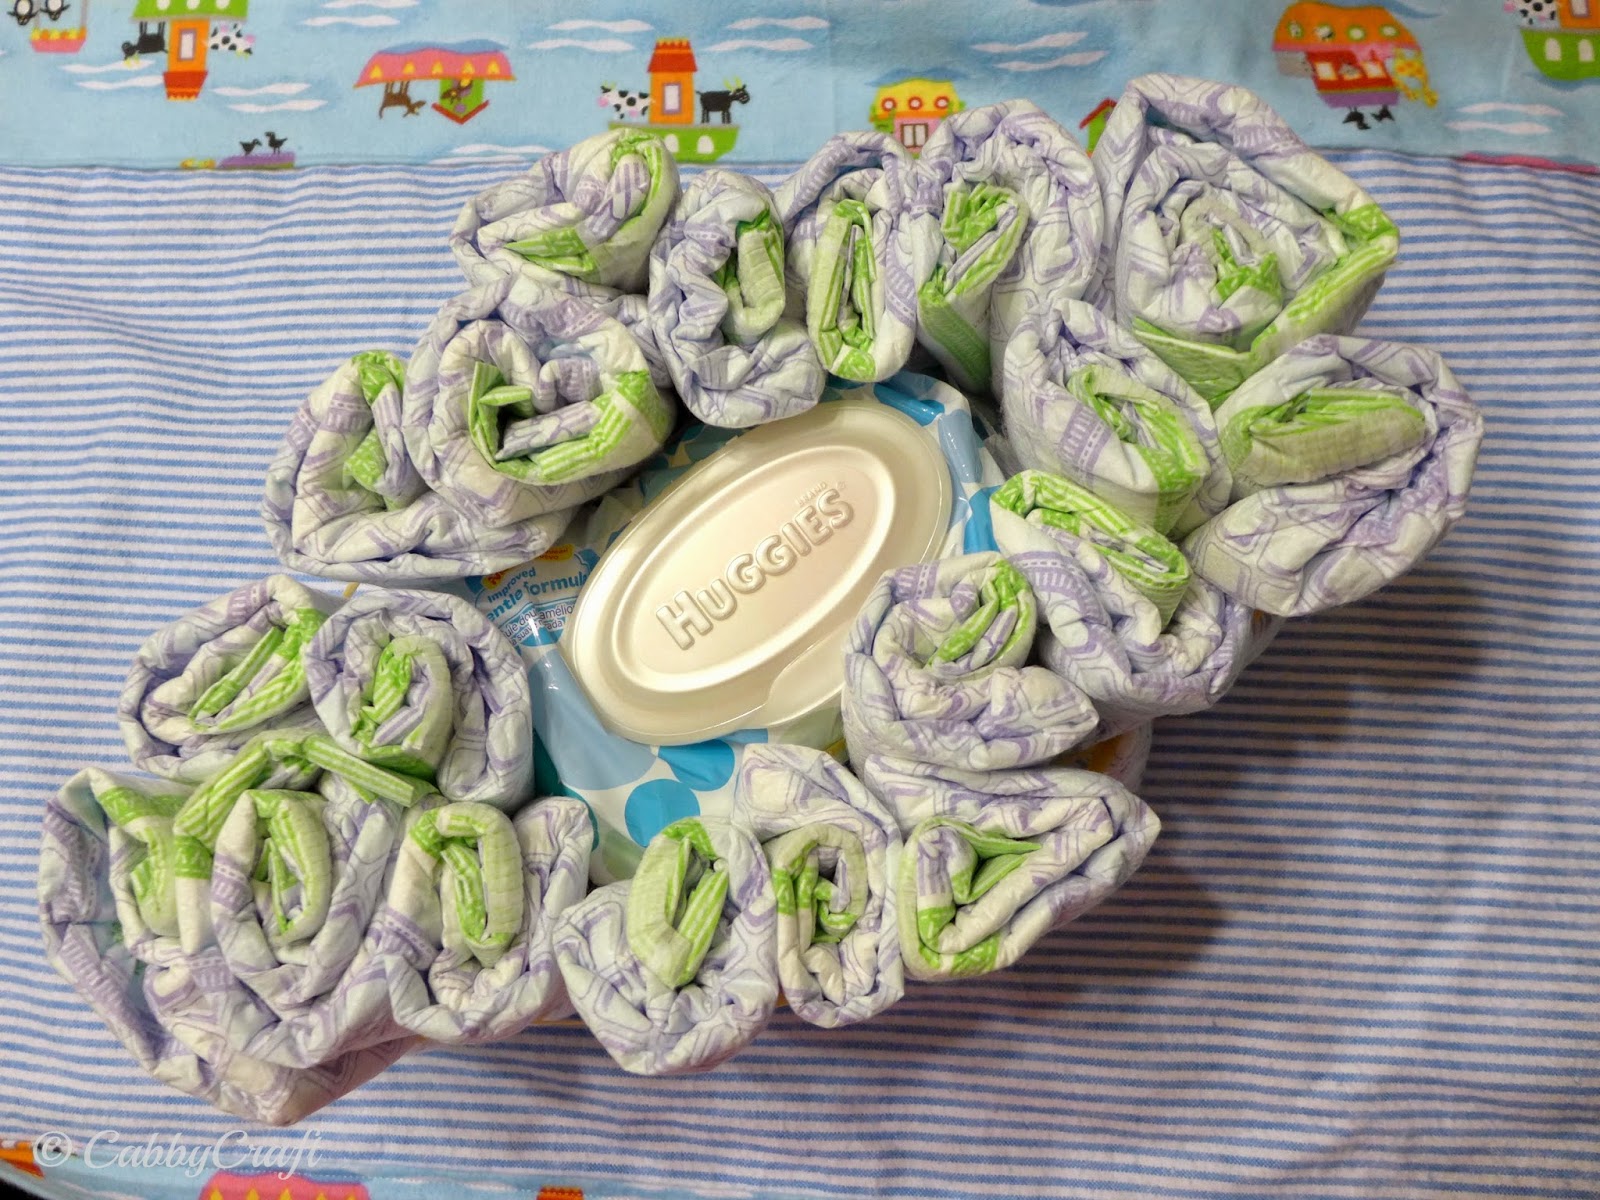
One weekend ago, we had a surprise baby shower at work where the theme was "Nautical."  I made this diaper centerpiece for Mason.  It had the basic stuff like a stuffed toy (this one is a bear form Carter's that says "I love you"), a small towel, about 20 diapers, diaper wipes, rubber bands, tape and a receiving blanket that I handmade.  I recently bought a sewing machine and all I want to do these days is to sew and I went all out with this project.  LOL.  It was fun!  I formed the diapers around the diaper wipes and secured them with rubber bands.  Then, I cover it with the blanket, added red paper for the deck and a blue flag on a coffee stick.  Just make use of what you have available.

The dessert and candy bar was dress up in red, white and blue.  There were cupcakes, gumball, and lots of candy that came wrapped in a clear "anchor bag."  Everything came out really beautiful.

I made these orange vanilla sailboat sugar cookies which came out pretty good but please pardon the crooked drawing.

I love attending babyshower parties especially because I don't have children - oh the joy and love that you feel from both parents... priceless!

See you soon!  
♥  michelle

Saturday, March 1, 2014

[Events] Head Over Heels Surprise!

Do you remember this necklace that I made for our dear friend on her "Surprise High Heels Party?"  I forgot to show you how we decorated the hall for the celebration.  She loves wearing high heels so we decided to make it our theme and used gold, black and white.  The topiary centerpiece were handmade using gold and white tissue paper, wooden dowels, faux flowers and crystals arranged in a tall glass vase with stones and moss. We printed pictures of high heels and I applied Ranger's glossy accents to make it look oh so shiny, just like most of her shoes and adhered it to the glass centerpiece.  We made a total of 20 which really looked pretty.  The giant shoe on the background was  painted on a foam core board and adorned with red and white flowers.  The "Happy Birthday" sentiment was made using cricut.
Golden Birthday Celebration
Black, Gold, White
DIY decors
The letter blocks were handmade as well -  we painted it black with a gold trim.  There were a lot of guests so we had to figure how to best arrange the round and rectangular tables, 2 sets of buffet tables, roast pig carving table, dessert table and the sound booth.  It turned out pretty well.  We placed a separate presidential table which allowed them to have a perfect view of the program.  The cake was orange chiffon made and beautifully decorated by Jane&Jill.   

Oh it was wonderful to see her so happy, being surrounded by so many people who love her.  Husband and I were super tired but it was the "good kind of tired."  This was my first major events arrangement and (pardon my boasting), it was beautiful!  

Soli deo gloria!
♥  michelle

Sunday, September 23, 2012

Travertine Tile Coasters

Welcome back!  It was a fun and hectic weekend for Mr. C and me.  We joined neighborhood street sale for the first time!  It was nice to meet our neighbors and sell some items as well.  More on that on a future post.

I would like to share with you a DIY project:  Travertine Tile Coasters.  You can see a lot of these in blogs or pinterest and though it's quite simple to make, it looks beautiful.
Materials:  1.  Travertine Tile 4x4 inches - It is best to use travertine tile (tumbled tile) for this project versus shiny ceramic tiles.  The tiles come in 9 pieces but some of them had more and bigger 'craters' in them, which also adds character.
2.  Solvent ink pad and rubber stamp cleaner.  StazOn solvent inks work best for this project as they are nicely absorbed by the material.
3.  Rubber stamps 
4.  Cork - to be used as backing.
5.  Cyanoacrylate glue

Procedures (kindly refer to the photo collage):
1.  Figure out your design and choose a nice stamp.  I used a sentiment and a vine stamp.
2.  Apply StazOn ink liberally and carefully stamp the tile.  Avoid "rocking" the rubber stamp instead press firmly.
Allow to completely dry.
3.  While waiting for the ink to dry, cut a cork sheet a little smaller than the tile.
4.  Use cyanoacrylate glue to attach it to the base of the tile.  Allow to dry for several hours to make sure it is secure.
5.  Your tile is ready to use!
I didn't apply a sealer anymore.  Gina K of StampTV said that it is permanent and water proof.  Well, I had to prove it to myself.  I ran tap water over it and true enough. the ink stayed crisp!

Try making these.  Have fun and share your project with me.

Have a blessed week ahead!

♥  Michelle