Wednesday, November 5, 2014

[Bag] I Love Paris!

Paris Cosmetic Bag
There is one place that I want to visit and that is Paris!   Yes, it's in my bucket list of "things-to-photograph" and my husband and I are dreaming making plans to go there one day.  My friends who have gone there fell in love with it, especially when the Eiffel tower was twinkling with lights at night.  For now, I will sing this song by The Frank Sinatra that my Dad would always sing to.
"I LOVE PARIS"

I love Paris in the spring time
I love Paris in the fall
I love Paris in the winter when it drizzles
I love Paris in the summer when it sizzles

I love Paris every moment

Every moment of the year
I love Paris, why, oh why do I love Paris
Because my love is here

I love Paris every moment

Every moment of the year
I love Paris, why, oh why do I love Paris
Because my love is here

She's there, she's everywhere

But she's really here

I've been seeing a lot of Paris-themed fabric in the craft stores lately and this particular one caught my attention.  I love the design that features Paris' main attractions including the Eiffel tower, the Arc de Triomphe and the Sacre'-Coeur Basilica.  I also like pink-green-black color combination.  This cosmetic bag is available for purchase in my ETSY shop.  It is lined with 100% Kona cotton in grey and a sturdy fusible fabric.  There are no raw edges and the bag is finished well.


It comes with an off-white muslin tied with raffia and is ready to be given as a gift for a wedding party, a birthday or to keep for yourself.  More details HERE.

Au revoir,
 michelle

Saturday, November 1, 2014

[Celebration] Giving Thanks Today and Everyday

Pumpkin patch

Hello, November, the season of pumpkins, pumpkin pies and thanksgiving in the U.S.  The history of thanksgiving dates back to the early 1600's when the Pilgrims gave thanks to God and celebrated the bountiful harvest after all the hardships that they experienced.  Pumpkins were a very important food source for them because it is very nutritious, delicious and has a good shelf life.  Nowadays, pumpkins are being used mostly for halloween decorations.  Many families with children visit different pumpkin patches and make carving an annual activity.  I just hope the children don't lose the real  meaning of the thanksgiving.
Pumpkin patch
One of the perks of taking public transportation is that you get to see and experience things that you'd otherwise miss when you're driving.  This time a year ago, I saw a pumpkin patch in one of the local churches in our area.  I wanted to check it out but by the time I had the chance to, they only had a few pumpkins left.  This year, I promised myself that I'd go before they were gone.   

Who said that pumpkin patches are for kids?
I would like to end this post by sharing with you the verse that we have in our dining room:
"Give thanks to the Lord, for He is good;
His love endures forever."
1 Chronicles 16:34
Be blessed!
♥  michelle

Sunday, October 26, 2014

[Tools] Mod Podge Mod Melts and Molds


I am a fan of Plaid Crafts, particularly their Mod Podge line of products, decoupage art and all.  They have another product line called Mod Melts and Mod Molds that have been around for a couple of years but for some reason, I only took notice a couple of months ago.


I bought a bag of Mod Melts in milk glass white and the Ornamental mold from my craft buddy, Michaels.  The sticks resemble that of a glue gun stick but it is thinner and uses a hi-temp glue gun. If you're familiar to using a glue gun, it's basically the same so be careful not to burn yourself and keep your working area clean and free of dust and lint.

There are Youtube videos by Cathy and Steve demostrating how easy it is to use.  Yes, it looks nice but it takes practice to squeeze the right amount of glue in the mold and making sure that there are no air pockets.  The piece cools pretty quick and it pops out quite easily.  Then you can add color or paint and incorporate them in your projects.

I tried to use a cameo mold and compared using the Mod Melts vs using Premo Sculpey Accent Pearl Polymer Clay.  I wanted to compare the details and ease of use of the different mediums.


The photo on the left was done using Mod Melts in milk glass white and the cameo on the right was with Premo Sculpey Accent pearl polymer clay that was baked according to manufacturers specifications.  Which one do you like?

I had difficulty in squeezing the mod melt into the mold vs the polymer clay where I conditioned and rolled a ball of clay.  I also noticed that the details using the mod melt are not as distinct as when I used polymer clay.  Perhaps I used a "difficult" and too detailed mold for my mini experiment but I wanted to push its limit.  The mod melts harden faster and is ready in no time whereas polymer clay has to bake for about 20 mins.  The Mod Molds are very nice and detailed as well.  The quality is excellent!

Have you ever used Mod Melts or Mod Molds before?  How did it go?   Please share your experiences with me.

See  you soon!
michelle

Wednesday, October 1, 2014

[Project] Hello, October!

Hello, October!  What?  Where did the time go?  It was this day last year when my parents and sister came to the US, yes, on the day of the government shutdown.  The memories are so fresh in my mind.

Well, I wanted to start the month making jewelry hence I made earrings!  I saw this article by one of my Bead soup blog party partners, Melissa Meman, in the April -May 2011 issue of Step by Step Wire Jewelry.  How cool is that?  I used peridot teardrop glass beads and copper wire.  It is not quite finished yet but it's a good start.

Melissa Meman's Article

I wanted to share with you this pair of Faux Stone Earrings that I made during my Integrated Earring Design Class with Ms. Kathleen Dustin.  These were made several months ago from polymer clay beads but I didn't know how to design and make use of them.  I added sterling silver wire that I oxidized and wow, I love how it turned out.  I'm planning to make more of these.
Faux Turquoise Stone made from Polymer Clay
Sterling silver earwire
I hope you enjoyed your first day of October.  Take care and see you soon!
michelle  ♥

Thursday, September 25, 2014

[Challenge] "Miniature Sweets for My Sweet"

"Sweets for My Sweet"
Philippine Polymer Clay Guild Miniature Food Challenge
The latest challenge of the Philippine Polymer Clay Guild was "Food for your Eyes" where they asked us to make miniature models of our favorite food.  I immediately knew that I wanted to make a dessert spread.  I made a croquermbouche drizzled with chocolate, Orange chiffon fondant cake and assorted cupcakes.

Whenever I make my crafts, I keep the computer one while I watch different TV series or movies. The latest series that I watched is MasterChef USA where in Episode 4 they were challenged to make Croquembouche which is a French dessert made of choux pastry, creamy filling and topped with threads of caramel.  I love profiteroles or cream puffs and this is the mother of it all.

The next is Orange Chiffon fondant cake and vanilla buttercream decorated with purple flowers.  Yum!

Finally, I made an assortment of cupcakes:  Purple yam, Vanilla and Caramel cupcakes.  Decadent!

So, who's ready to party?!
michelle  

Monday, August 11, 2014

[Sewing] I'm Sew Addicted!

Hello August, you surprised me!  I wasn't quite ready to leave July behind and now, it's just 4 days til we hit the 15th.  Geeeeez.  Welcome back, friends!  Thank you for taking time to come back and hang around with me.  Let me tell you what's keeping me busy these days.

See this?  Oh yes, I got me Singer sewing machine a month ago and I'm sew addicted to sewing! Really.  When I was young-er, my Mom and my Aunt taught me how to sew using a needle and a thread to mend hems, buttons and what not.  Then they taught me how to use our manual Singer sewing machine.  We made dresses for my Barbie dolls, skirts, pillowcases and comforters.  When I was in high school, our teacher asked us to make a smocked sundress which was quite challenging at that time.  

Since I came to the States, I discovered that my dear mother-in-law also had a Singer sewing machine. I tried to fix and use it but I think that it has to be brought to the sewing clinic for a more thorough examination.  Two months ago, the thought of buying one haunted me.  No kidding.  

Enter Google... 

Just like any buyer these days, I did my internet research which turned out to be overwhelming.  There were different brands to choose from but I chose to get a Singer since its the brand that I trust and for sentimental reasons.  Upon checking their site, I discovered that there were so many machines to choose from:  basic, very basic, electronic and embroidery.  Whew!  So, I wrote down the features that I wanted:  durability, good motor, price, enough stitches, and 1-step buttonhole among others.  In the end, I bought the Singer Heavy Duty 4432.  You may have your brand or machine preference but so far, this works well for me.
[via]

The first project that I did was a throw pillow cover.  This 1 yard yellow and blue outdoor fabric was enough to make a couple.  I measured our throw pillows and cut  a 1-inch seam allowance all around. To avoid fraying, I added a narrow zigzag stitch on all the edges.  Stitch the wrong side of the three (3) corners, leaving one side open.  Insert the pillow and close the opening using whatever you have available.  I used small button fasteners.  You stitch a ribbon on both sides, add a button and buttonhole, etc.  Get creative.

Blue Floral and Yellow Pillowcase
 Here it is.  Not bad at all.  I was able to make three covers.
Blue Floral and Yellow Pillowcase
There will be a new feature in the blog starting today.  You guessed it right!  We will be adding topics on  SEWING!  Wooohooo!  We will talk about tools, patterns, projects, bags and everything about sewing.  Stay tuned for that.

Sew you soon!
michelle


Wednesday, July 30, 2014

[Crafting] Recycled Streamers Deluxe

The cost of craft and designer paper has gone up these days and I feel bad to just throw scraps away. I love to recycle paper, extend its life and multiply its purpose.  We had a lot of decorating to do this month wherein we used blue streamers that I bought from the dollar store.

This was the backdrop for the dessert table during our Sunday luncheon for our Pastor.  I made paper rosettes using bright, colored pattern paper and my Martha Stewart scoring board.

Streamers and DIY Paper Rosettes

We used the same bright decors to decorate one of the rooms for the Vacation Bible School.  Doesn't it look fun with the twisted streamers?  Well, it was my husbands Bible Adventure room so I guess there's a little bias in saying that.

VBS Classroom Decor
Streamers and DIY Paper Rosettes
 We didn't throw the rosettes and streamers after VBS.  As always, I thought that it could be used for another day.  Well, that day did come.  Our church volleyball team was one of teams who competed for the championship.  They played last year too and they placed 2nd - remember THIS tutorial using blue tissue paper last year?

This time, I used the streamers to make these pompoms.  I folded, cut 1/4 strips and wrapped it with tape.  Simple.  Dirt cheap.  Clean fun!  Did they win the championship?  Yes, they did. It was neck and neck, very exciting game!

Volleyball and DIY Pompoms

Congratulations, team 1st Phil!


Do you like to recycle decor and craft supplies like I do?  Cool!

Have a wonderful day,
michelle

Tuesday, July 15, 2014

[Travel] California Trip

A couple of weeks ago, I had the opportunity to fly to California to visit my folks and grace my "Lolo's" (grandfather's) 90th birthday celebration.  It's been quite some time since I last saw him and it was a blessing that I was able to greet and dance with him.  Oh yes, it was a ballroom dancing affair. His guests looked much older than we were, clad in their Hawaiian luau dresses and shirts and heated the dance floor like no other!  For those folks, arthritis didn't seem to exist!

It was a relaxing weekend spent swimming and enjoying the California sun.  I was able to eat good fish tacos from California fish grill, bacon fried rice from The Loft, salted mocha from Flurries shaved snowbar and Ube donuts and assorted dossants from Friendly donuts.  Whew!  Way too much food.

We went to Downtown Disney where I saw Olaf... lots of happy and funny Olaf's.

I stood in awe of this colorful wall of Lego bricks... 
The Wall of Lego Bricks
...and amused by these cute fellas.
Lego characters
I also had the opportunity to worship with my aunt at Saddleback Church at the City National Grove. It was very timely because I was reading Pastor Rick Warren's book "The Daniel Plan" that time.
Saddleback Church
It was a fun-packed weekend that was too short.  My evening was cut 2 hours short coming back to Tx and as you might have guessed, it was a challenge going back to work the following day.  I thought it might be jet lag but that would be thinking too much already.

Until next time.  Be blessed!
♥  michelle

Tuesday, July 1, 2014

[Baby Shower] DIY Sailboat Diaper Cake

Sailboat DIY Diaper Cake

Happy 1st of July, folks!

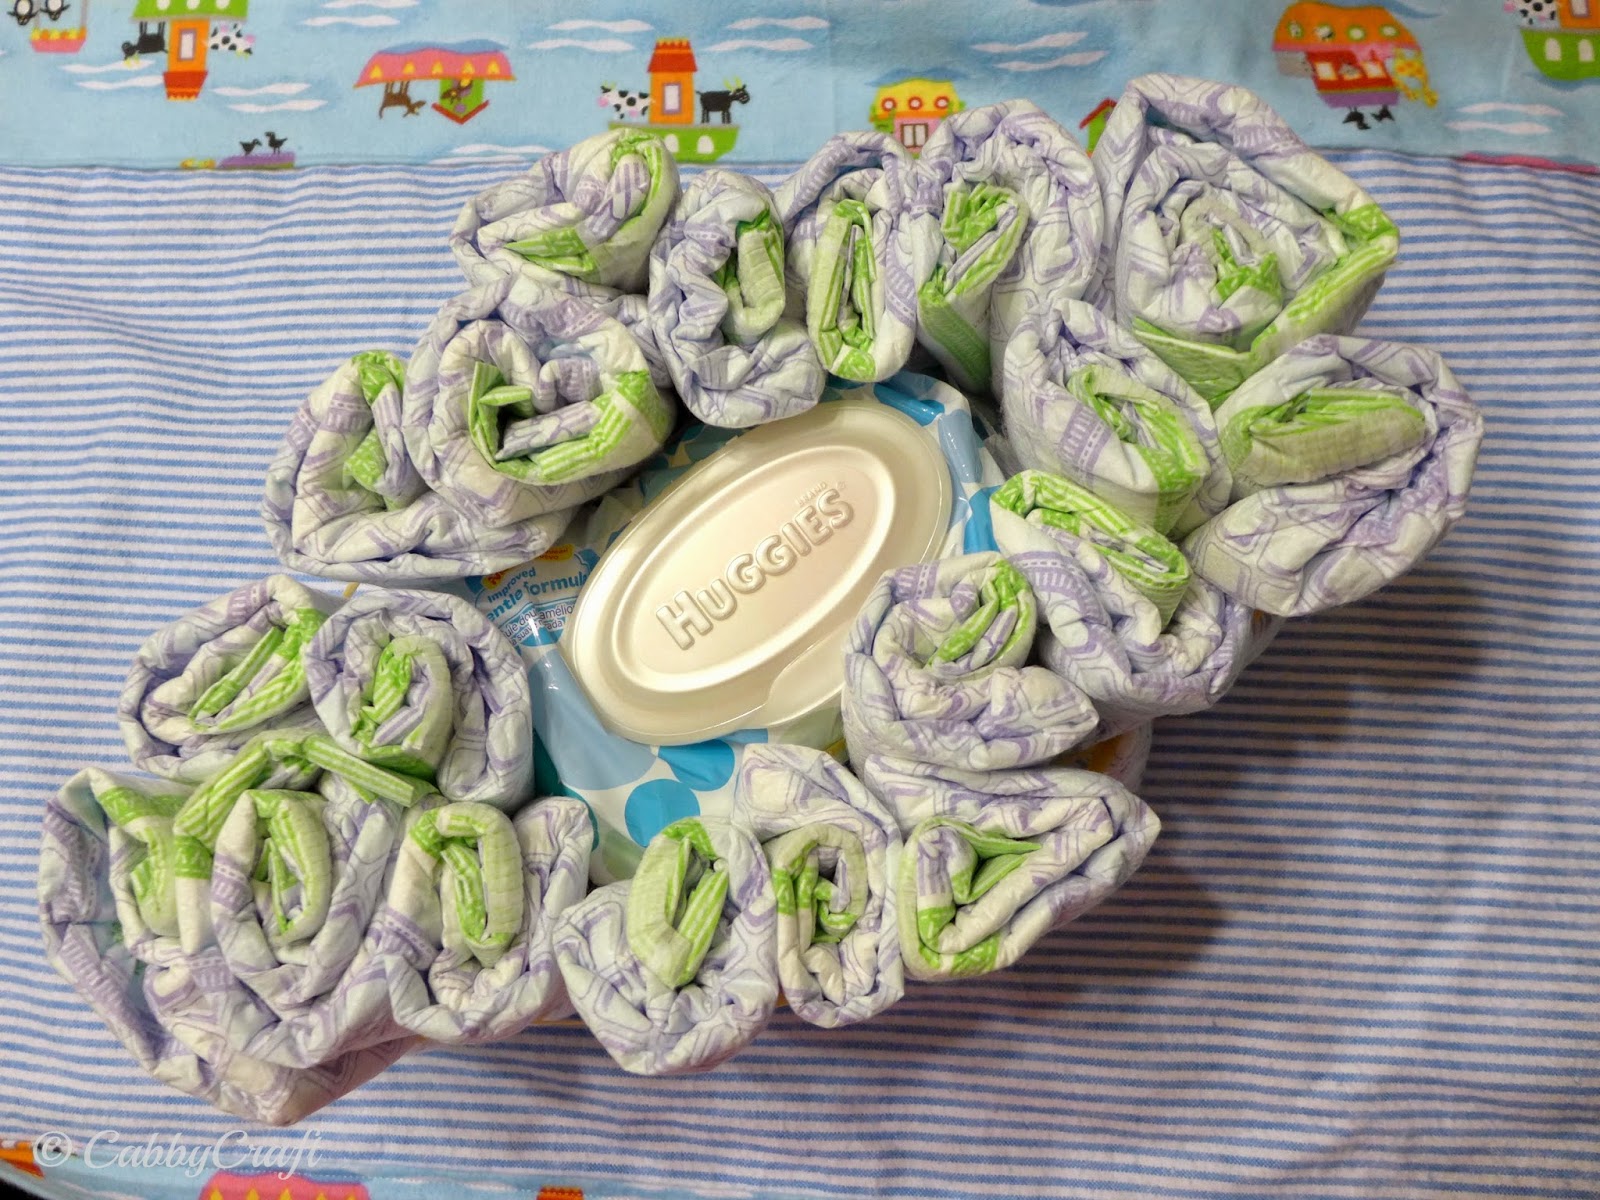
One weekend ago, we had a surprise baby shower at work where the theme was "Nautical."  I made this diaper centerpiece for Mason.  It had the basic stuff like a stuffed toy (this one is a bear form Carter's that says "I love you"), a small towel, about 20 diapers, diaper wipes, rubber bands, tape and a receiving blanket that I handmade.  I recently bought a sewing machine and all I want to do these days is to sew and I went all out with this project.  LOL.  It was fun!  I formed the diapers around the diaper wipes and secured them with rubber bands.  Then, I cover it with the blanket, added red paper for the deck and a blue flag on a coffee stick.  Just make use of what you have available.

The dessert and candy bar was dress up in red, white and blue.  There were cupcakes, gumball, and lots of candy that came wrapped in a clear "anchor bag."  Everything came out really beautiful.

I made these orange vanilla sailboat sugar cookies which came out pretty good but please pardon the crooked drawing.

I love attending babyshower parties especially because I don't have children - oh the joy and love that you feel from both parents... priceless!

See you soon!  
♥  michelle

Monday, June 30, 2014

[Handmade Tags] Father's Day Necktie Tags


Hello folks!  Before we bring the month of June to a close, let me share with you these Necktie tags which I made for Father's Day but may be used for any special occasion,  These tags are so small and very cute.

Materials:
Base paper, 2 x 3.5" , I used craft paper here
Blue paper, 2 x 1.5"
Printed paper, 1 x 1"
Glue
Ruler
Cutter

Instructions:
1.  For the collared base shirt, take your 2 x 1.5" colored paper and cut a slit measuring a few centimeters on each side, and about 1/2 cm from the top.  Fold toward the center.
2.  Take the printed 1x1" sheet of paper.  Fold diagonally then open flaps.  Follow the photographs below.
3.  Once the necktie is done, apply a dab of glue and stick it on the center of the shirt.

Oh yes, it was totally cool.  I made 55 tags which we gave to the Fathers in our church together with some other goodies.

See you again next year, June.

michelle

Wednesday, June 11, 2014

[Challenge] Phil. Polymer Clay Guild "Merry Month of May 2014: Polymer Clay Flowers"

The challenge of the Philippine Polymer Clay Guild for the month of May was ti create something new using polymer clay flowers.  I've been making a lot of floral themed pieces, mostly daisies or simple flowers with 5 petals and I didn't know what to do for this challenge.  Then one day, while I was cleaning my craft room, I found a tutorial about "Orchid Pin or Pendant" that I bought from Ms. Penni Jo Couch during the 2013 Lone Star retreat.  The tutorial was simple, well written and well illustrated. 
Polymer Clay "Rhoda Orchid" Napkin Ring
This is my "Rhoda Orchid."  I named it after my mom who loves and grows orchids back in the Philippines.  There are several varieties of orchids but the color combination that I used in making this one are probably non-existent.  It's more of like a fantasy orchid, if you could call it that.  
Polymer Clay "Rhoda Orchid" Napkin Ring
This project made use of Premo sculpey clay.  I also used Ranger alcohol inks in Sunshine Yellow and Butterscotch to add color to and specks on the white petal.  I like how it turned out - very rustic. I'm planning to make "real life" orchids in white like Cattleyas and green Cymbidium.  They will make pretty sets of napkin rings just like this one for weddings or intimate dainty parties.  Stay tuned for that.

Oh, did I mention that it is National Clay Week?  Yes it is!  

See you soon!
michelle

Sunday, June 1, 2014

[Baking] Celebrate June with Hokkaido Cakes

Hokkaido Cake
Cream-filled Chiffon Cake

Let me share with you this Hokkaido Cake that I made a couple of weeks ago.  I tried the recipe from Ms. Corinne and it turned out pretty good.  Hokkaido cakes are very popular in Asia.  It's basically a chiffon cake baked in small square muffin cups filled with cream and topped with a dusting of powdered sugar and fruits in season. It's delicately sweet, soft and fluffy.

Well, it's official... today marks another month closer to Christmas.  As I flipped the page on our wall and kitchen calendars, it made me realize how fast time flies.  This was followed by thoughts of "what have I done so far?  Have I accomplished what I have planned to do this year?  Did I use my time wisely?"

One of my goals this years particularly for CabbyCraft is "to improve the blog and to write more."   Well, I haven't written more than I what I planned to but I was able to have my blog critiqued by Ms. Martine.  It was a brave step to consult with someone but I admire her professionalism and honesty in doing so.  Martine inspired me to do more.  There will be some changes in the next few months... perhaps, move to a website or what not.  Stay tuned for that.

Have a blessed week, friends!

Saturday, May 10, 2014

[Bead Soup] Its the 8th Bead Soup Blog Party 2014 Reveal Day!!!

http://www.prettythingsblog.com/2014/05/welcome-to-8th-bead-soup-blog-party.html

Welcome to the 2014 Bead Soup Blog Party hosted by Ms. Lori Anderson of Pretty Things Blog.  

This is my 4th party and this year, I was paired with Peggy of Charm Barn.  I love the assortment of bright and interesting beads and findings.  She gave so much beads that I was able to make 3 pieces and have leftover beads for another project.

One of the focal bead that she sent is a "nest."  I've always wanted to have one and finally, I got it! This necklace is called "Nestled" and is a combination of the red creek jasper, pink stones and beads and wire.  The wire nest houses a stone and since it's Mother's Day, let me share my story.  My 2 siblings and I live in different countries and my parents are on their own.  The stone inside the nest signifies that no matter where we are, the 3 of us are safe and secure in our mom's heart.
"Nestled"
8th Bead Soup Blog Party 2014

One of the clasps she sent had crystals on it.  Very nice!  I like the combination of the pink beads against the stone.
"Nestled"
8th Bead Soup Blog Party

Take a look at these cute silver spacer beads.  Is it a bird, a whale or a fish?  LOL.  I wanted to do something fun and colorful with it and since I had light blue and purple hemp cord available, I made a macrame bracelet with a sliding knot closure.  The ends were finished with a silver bead.  Fun!  Fun!  Fun!
Macrame Bracelet
8th Bead Soup Blog Party 

And finally, I made this statement bracelet.  It started out with making a wire base using a thick gauge wire and then adding the rest of the beads.  I formed the base flower using Vintaj copper wire and filled it up with crystals and pearls.  Then the finished flower is placed and wired on top of the frame.  It sits on the wrist nicely and the pop of color shouts "Spring!"


Wire-Wrapped Floral Bracelet

Thank you for stopping by my blog.  Please head over to my partner, Peggy of Bead Charm to see what she's made.  Click on this LINK to see the rest of the participants.  

I would like to thank Ms. Lori for all her hard work in making this party possible.  

Have fun!
michelle

Sunday, May 4, 2014

[Baking] Chocolate Lava Cake

Chocolate Lava Cake
If there is one person who loves cholocate-y desserts more than me, that would be my husband.  It's his birthday and I thought of baking something extra special... just for him.  We have gained so weight in the past several weeks and it's mostly because of our physical inactivity, being sedentary most of the time.  Yes, I have been baking here and there but it's always "to share" with family and friends.  Well, this Chocolate Lava Cake Recipe is served in ramekins, small enough for one person.  Talk about portion control.

There are many recipes online.  I did my research and came up with my own.

Chocolate Lava Recipe (serves 4, 6oz ramekins)
Ingredients:
2 large whole eggs
2 egg yolks
1/4 cup sugar
2 Tbsp all purpose flour
1/2 tsp vanilla
1/8 tsp salt
3.5 oz Scharffen Berger Bittersweet dark chocolate, cubed
4 oz unsalted butter, cubed

Procedure:
1.   Preheat oven to 450C.  Line ramekins with butter.  The ramekins we have are 8oz and are wide rather than tall - I was able to make 3 portions.
2.   Place butter and chocolate squares in a glass bowl and melt in a double broiler (just because we don't own a microwave).   Mix well.
3.   Beat the whole eggs and eggyolks until pale yellow.  Add the sugar and beat until completely dissolved.  Add the vanila and salt.
4.   Pour the chocolate mixture into the egg mixture and combine.
5.   Fold in the all purpose flour.  Mix.
6.   Gently pour the mixture into the prepared ramekins.  The cake will be baked in a water bath (baine marie) so place the filled ramekins in a deep dish filled halfway with hot water.
7.    Bake for 15 minutes.  Your cake is done when the sides are firm to and the center is soft (and jiggly).
8.   Take the cake out of the oven and gently run a knife along the side and place a plate and carefully invert the cake.
9.   Sprinkle powdered sugar and top with your favorite fruit (I used mangoes).

It was delicious and my birthday boy loved it!

Enjoy!  Happy baking!
michelle

Sunday, April 27, 2014

[Baking] Mango Chiffon Cake

Mango Chiffon Cake

Spring in Texas means the start of the season for Mangoes.  Woohooo!  I love mangoes especially the sweet ones.  The Mango Chiffon Cake is one of the more popular desserts in the Philippines.  I have several favorite mango desserts:  Mango PavlovaCanonigoConti's Mango Bravo, and Mango ice box cake to name a few.

Ms. Corrinne has a Mango and Cream Cake recipe that I've tried and tweaked a bit to call it my own. I lessen the sugar by 1/2 - 1 tablespoon to lessen the guilt and I add cubed mangoes in the batter on days when I feel extra special.

MANGO AND CREAM CAKE from Ms. Corinne of Heart of Mary
(recipe suitable for two 9" by 2 1/2" round pans, or one 10" by 3" round pan)
Chiffon Cake:
{A}
2 1/4 cups sifted cake flour
3 teaspoons baking powder
1 teaspoon salt
3/4 cup white sugar

{B}
1/2 cup corn/canola oil
7 egg yolks, from extra large eggs, at room temperature
2/3 cup water 
1 teaspoon vanilla extract
1/2 teaspoon lemon or orange extract

{C}
7 eggwhites
1/2 teaspoon cream of tartar

{D}
3/4 cup white sugar

Procedure:
1. Preheat oven to 175 degrees Celsius. Line bottom of baking pans with parchment paper.  Do not grease pans.
2. In a large bowl, combine {A} well. Add in {B}. Beat with electric mixer or by hand until smooth and well blended.
3. In a separate bowl, beat {C} on high speed until frothy. Gradually add in the sugar {D} and beat until stiff peaks are formed. Gradually and gently fold in egg whites into egg yolk mixture. Pour batter into baking pans.  If using two 9" pans, divide the batter equally.
4. Bake for about 55 minutes or until top springs back when lightly touched. Invert pan into wire rack immediately and cool completely.
5. To release cake from pan, carefully run a thin knife around sides of pan, then invert. For easier handling, wrap your cake very well in cling film, then refrigerate overnight before frosting.

Mango Whipped Cream Frosting:
2 cups whipping or thickened cream, very cold
1 250g bar of cream cheese, soft but still cold
1/2 cup sugar
1 teaspoon vanilla extract
about 3 medium-sized mangoes (more if you love mangoes!)

*Make sure your mixing bowl and beaters for the whipped cream are all well chilled to achieve better volume.

Puree mango meat of one mango.  Set aside.

In a small bowl, beat the cream cheese until smooth.  Set aside.

In your chilled bowl and using clean beaters, beat the whipping cream, sugar and vanilla until the mixture is quite stiff. Gently fold in the cream cheese then beat again at high speed for a few seconds or just until everything is well combined.  Be careful not to overbeat.  Carefully fold in the mango puree.

To assemble:
Cut up the rest of your mangoes into small cubes or thin slices (whichever you prefer) to use for the filling and for garnishing.

Place one cake layer on your cake board, top side up. Use some of the frosting to fill the cake.  Scatter the mango cubes/slices all over the filling.  Place the top cake layer over the bottom layer, bottom side up.  Frost the cake with the remaining whipped cream frosting, decorate as desired and garnish with more mango cubes/slices.
------------

I love that it comes out fluffy, soft, delicately sweet and is always a hit among friends and family.  Try it soon.

Have a wonderful week!
michelle

Monday, April 21, 2014

[Baking] Pavlova

PAVLOVA
Four years ago, we visited family in Australia where I had my first taste of this delicate dessert:  Pavlova.  It is a meringue-based dessert with a crisp outer shell and gooey, marshmallow-like on the inside.  They say that the dessert was created in honor of a ballet dancer Pavlova, hence the name, during her dance tour in Australia and New Zealand.

The recipe is different from the regular meringue recipe in that it uses cornflour which causes the center to be gooey.  It is also baked for a long time, 90 minutes, and cooled in the oven.  The recipes in the internet are basically the same.  I used this one by Catty.

PAVLOVA (adapted from The Catty Life)
4 large egg whites
1 cup caster sugar
1 teaspoon vinegar
1/2 tablespoon corn flour
300-500 mL whipping cream 
1 1/2 cup strawberries
1 cup blueberries
1 piece kiwi
1 mango (pureed or diced)
  1. Pre-heat oven to 120°C/250°F.
  2. On a sheet of parchment/baking paper, draw an 8″ diameter circle. Turn over, or place another sheet on top but make sure you can still see the circle.
  3. Separate egg whites from the yolk and place in a clean large mixing bowl. Beat at a medium to high speed until soft peaks form. 
  4. Gradually add in the sugar while still beating and continue to beat until stiff peaks form. Your mixture should now be a smooth meringue.
  5. Sprinkle vinegar and corn flour over the mixture and fold in with a spatula.
  6. Using a spatula, spoon the mixture onto the prepared baking tray and baking paper keeping the meringue inside the circle. Smooth over and try to make the outside edges slightly higher than the inside edges.
  7. Bake meringue in oven on a middle shelf for 90 minutes. After 90 minutes, turn off the oven, leave the oven door slightly open and leave pavlova to cool for 2 hours or over night if possible.
  8. When ready to serve, beat the whipping cream in a large bowl until it becomes firm enough so that it can hold itself up. Spread across the top of the pavlova.
  9. Wash and prepare strawberries, blueberries and kiwi.  I wanted to use passion fruit but since we don't have any, I pureed a mango and drizzled it on top.
It was yummy!!

Enjoy!
michelle